Second Add the Device to DMSS APP (Three ways)
Use the Custom QR Code
Step 1: Access the Add Camera Feature
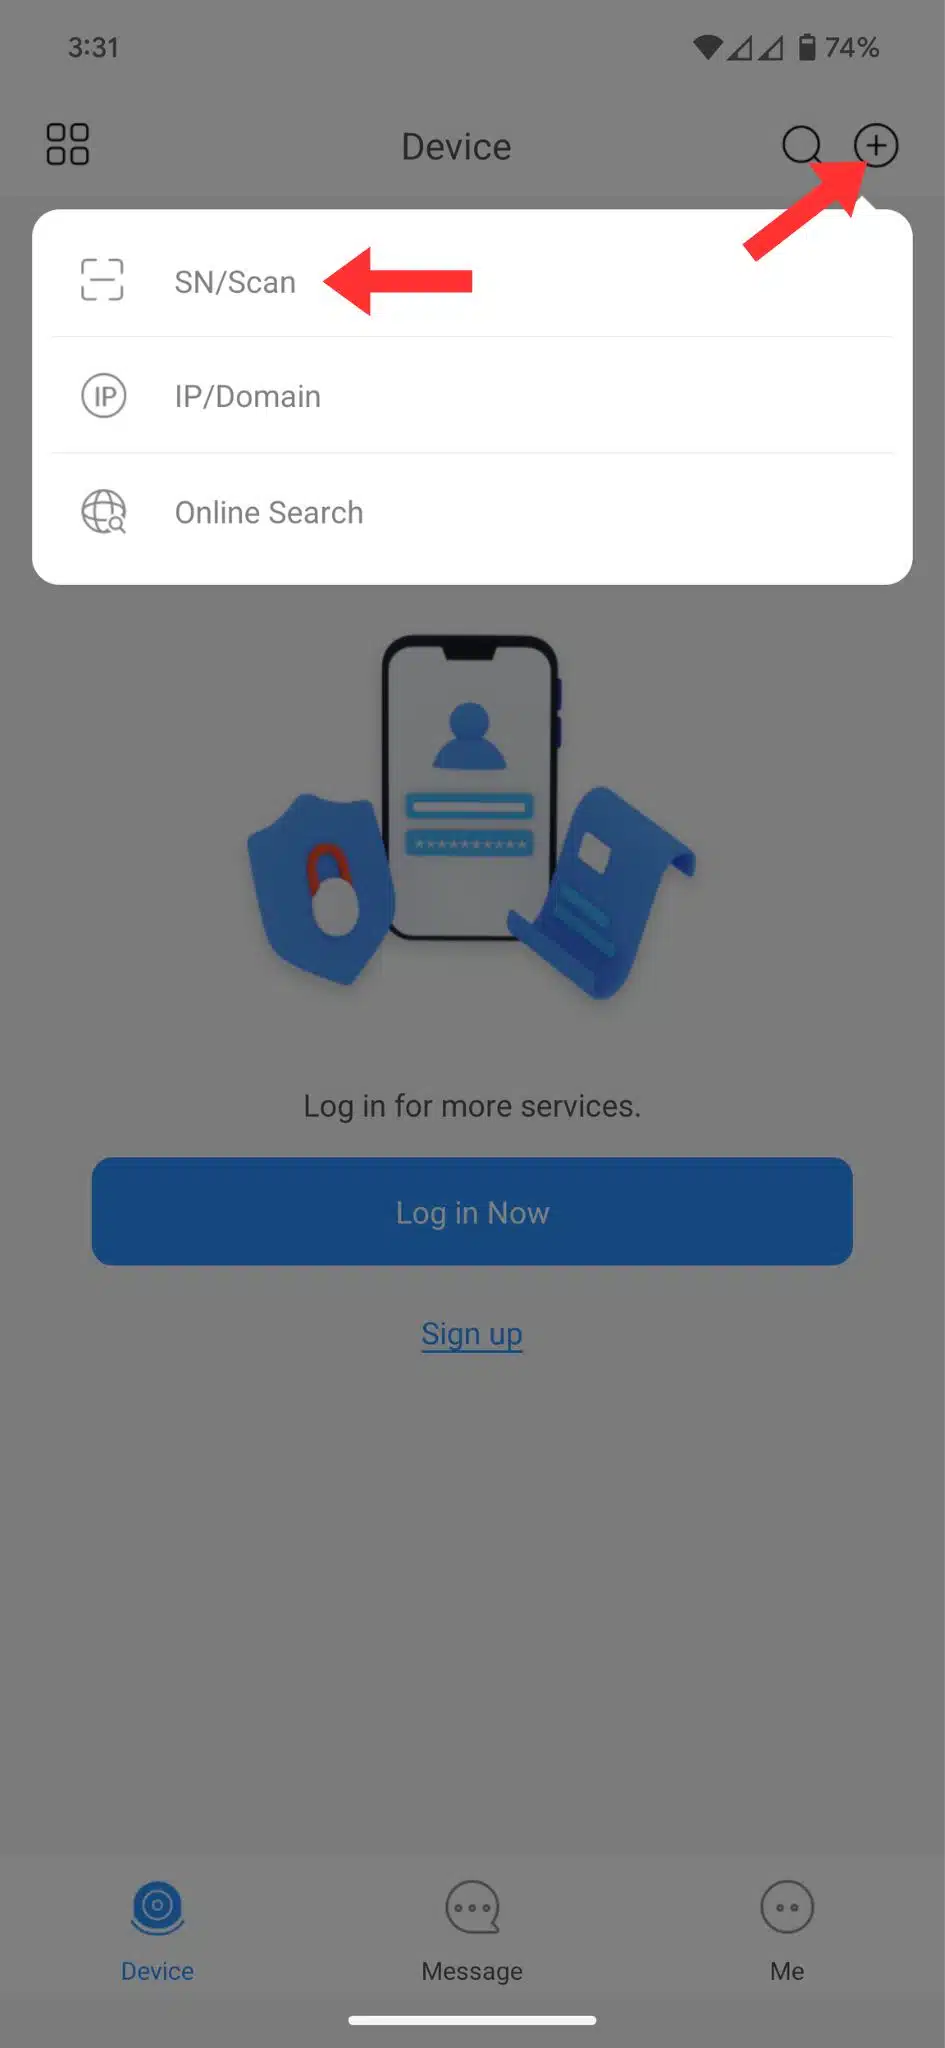
Select the “+” icon located at the top right corner of the interface, then choose “SN/Scan”.
Step 2: Scan the Installation QR Code
Scan the QR code provided to you on the day of installation, this would have been provided for you on the back of our business card.
Upon completing these steps, your camera(s) will be added to your system.

Use the QR Code on the bottom of the NVR
Step 1: Find Your QR Code
If you have misplaced the QR code, do not worry. You can still locate a QR code on the bottom of the NVR (Network Video Recorder).
Step 2: Scan the QR Code
Use your device to scan the QR code. This can be found on the bottom of the NVR.
Step 3: Enter Account Details After scanning the QR code, you will need to enter the following details for setup:
Alias: Enter “Home”.
Username: Enter “admin” (Please note: This is case sensitive).
Password: Enter “Hifiguy123!!” (This is also case sensitive).
Completing these details will finalize your setup.
Create a QR Code on an Existing Device
Step 1: Create a QR Code on the Existing Device
Open the App: Start by launching the DMSS app on the device where the cameras are already installed.
Export Device Settings:
Navigate to the “Me” section.
Select “Service.”
Select “Export Device.”
Choose the device you wish to transfer, typically named “Home.”
Generate a Device Card:
Select “Create a Device Card.”
When asked if you want to create a password, choose “No.”
Step 2: Transfer to a New Device by Scanning the QR Code
Scan the QR Code: Use the new device to scan the QR code generated by the existing device.
By following these steps, your camera setup will be transferred to your new device without the need to manually enter the details.
